[ IoT & Automation ] guides.smart-irrigation-iot
Automate your grow with a $22 sensor. No dead plants. No guesswork.
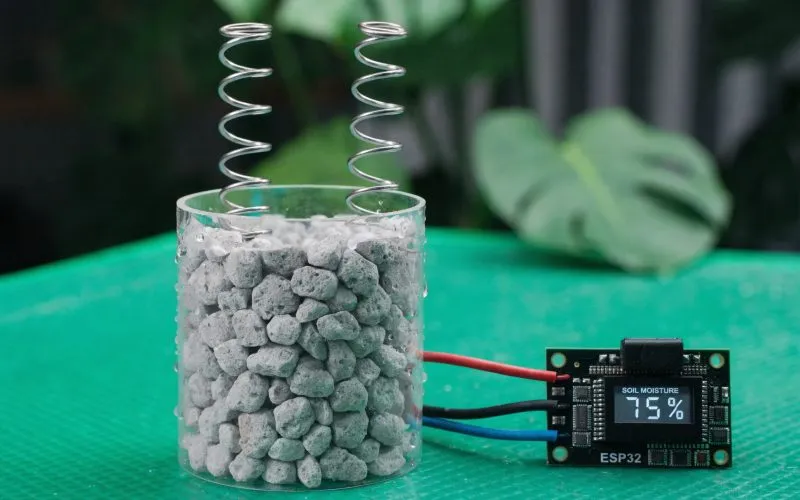
Alex T. (software developer, NYC) connected a capacitive soil moisture sensor to an ESP32 in an afternoon. Three months later, zero dead plants and full uptime data. Here's the exact setup, with wiring diagrams and firmware you can flash today.
Alex's setup: capacitive sensor, 10kΩ pullup, MQTT to Home Assistant. Full uptime since February.
$22
Alex's full sensor cost
esp32 + capacitive sensor
3 months
Continuous uptime
since february, no restarts
0
Dead plants since setup
alex's nyc apartment grow
100%
Open-source firmware
arduino + esphome + mqtt
[ 01 ] Results.log
Three IoT builds with real uptime data
Every build is documented by the person who ran it, sensor choice, wiring, firmware, and uptime since go-live.
[ 02 ] Process.log
The automation path
Four steps from manual watering to a fully automated, monitored grow room.
- 01
Add a moisture sensor
The first IoT step: a capacitive sensor tells you when to water. Alex's build shows the exact wiring. Read the guide →
- 02
Add a pump relay
Once you know when to water, automate the watering. A 5V relay and 30 lines of code handles it. See the open-source tools that make this easy. Read the guide →
- 03
Connect to MQTT
Publish your sensor data to an MQTT broker so other devices and dashboards can read it. Read the guide →
- 04
Build a dashboard
Grafana + InfluxDB gives you historical charts, alerts, and real-time status. Explore the full smart irrigation setup. Read the guide →
[ sudo sensor ]
Automate this system with an ESP32
Alex's $22 sensor build is the right starting point. Capacitive sensor, ESP32, MQTT to Home Assistant. Three months of full uptime data attached.