Why Microgreens Are the Perfect First Crop for Beginners
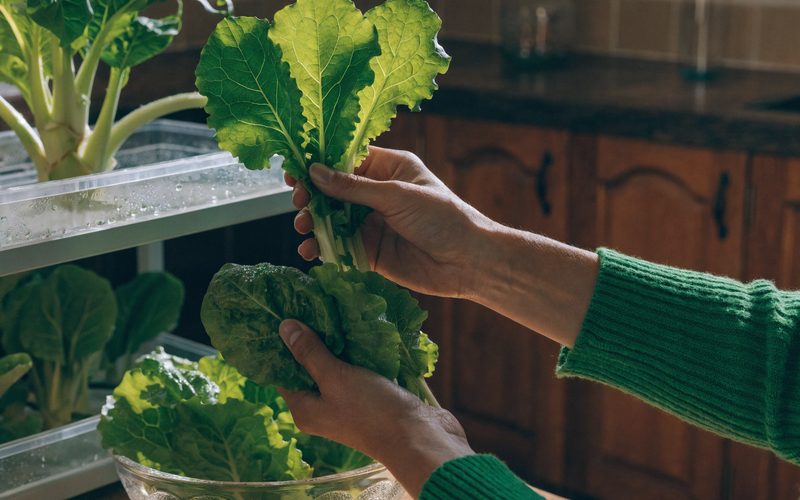
Every person who eventually grows a lot of food started with a single tray of something. For a lot of them, that something was microgreens.
I grew up in apartments. No backyard, no patio, no garden. The first food I ever grew was a tray of radish microgreens on a bookshelf in a studio apartment, under a cheap LED light clamped to the shelf above it. Seven days later I cut them with scissors and put them on a sandwich. That was it. I was done for.
If you have been sitting on the edge of growing your own food, curious but not sure where to start, or quietly convinced you’d fail, this is the post I wish someone had handed me before I spent two years over-thinking it. Microgreens are the right place to start. Not because they’re the most impressive thing you can grow (they’re not), but because they teach you everything important without requiring you to invest in anything you might abandon.
Here’s why, and exactly how to get started.
Why Start with Microgreens Instead of a Full Garden
There’s a common trajectory for people who want to grow food. They decide they want to do it. They read about soil pH and companion planting and raised beds. They plan a garden. They spend money on materials. Then it’s the wrong season, or they move, or the weeds win, or the tomatoes get blight, and the project dies somewhere in the gap between ambition and result.
The failure isn’t effort. It’s feedback lag. A vegetable garden takes months to tell you whether you did something right. By the time you find out your soil was the wrong pH, you’ve been committed for a season. If it goes badly, there’s nothing to iterate on until next year.
Microgreens short-circuit that cycle. The feedback loop is days, not months. You can run four or five complete grow cycles in the time it takes a tomato plant to flower. That means four or five chances to learn what happens when you over-water, or under-water, or use seeds too densely, or don’t keep the temperature warm enough. Each lesson is immediate and cheap: a failed tray costs $2-3 in seeds and medium.
The other reason to start here: microgreens growing is genuinely a subset of all other plant growing. If you understand germination, light, moisture, and harvest timing at the microgreen level, those concepts map directly to soil gardening, raised beds, and hydroponics. You’re not learning a niche skill. You’re learning the foundation.
The Five Objections
These are the things people say when I suggest microgreens as a starting point. I used to say most of them myself.
”I don’t have outdoor space.”
You don’t need any. Microgreens grow indoors on a flat surface under a light source. A 10x20-inch nursery tray, the standard size, available anywhere, fits on a kitchen counter, a windowsill, or a bookshelf. The only outdoor activity involved is optionally germinating seeds in a dark spot, which can just as easily be a drawer or a cabinet.
People grow microgreens successfully in studio apartments, basement apartments, north-facing rooms, boats, and RVs. As long as you have a horizontal surface and access to water, you have everything you need for space.
”I’ve never grown anything.”
Microgreens are one of the shortest and simplest grow cycles in agriculture. Radish, the best first variety, germinates in 24 hours and is ready to harvest in 5-7 days. The total number of actions required to grow a tray of microgreens: fill the tray with growing medium, scatter seeds, mist with water, cover for 2-3 days, uncover, water once a day, harvest in a week.
There is genuinely not much to go wrong if you follow basic steps. The seeds want to grow. Your job is not to stop them. Provide moisture, remove the dome once they’ve germinated, give them light, and don’t let them dry out. That’s it. I have watched people with zero growing experience produce a successful first tray on their first attempt, which is not something you can say about most crops.
”I don’t have money.”
The startup cost for a first tray of microgreens is $10-15. Here’s exactly what that includes:
- A 10x20-inch nursery flat: $1-2 (or repurpose a takeout container)
- A packet of radish seeds: $2-4 (enough for 2-3 trays)
- 1-2 quarts of coco coir or potting mix: $3-5
That’s your first harvest. You do not need a grow light for your first tray if you have a south-facing window. You do not need pH meters, EC meters, humidity domes (a piece of cardboard works), or specialty equipment. The minimum viable setup genuinely costs less than a decent salad from a grocery store.
If you want to grow consistently, a basic LED grow light ($15-30) is worth adding. But that’s an upgrade, not a requirement to start.
”I don’t have time.”
Maintaining a tray of microgreens takes roughly five minutes a day. You water once in the morning, check that the medium isn’t dry by evening, and otherwise leave it alone. There’s no pruning, no weeding, no staking, no pest management at scale. You’re watering seeds for a week.
Compare that to a garden bed, which requires consistent time for weeding, fertilizing, watering, and pest management across multiple months. Microgreens are the most time-efficient crop that produces meaningful harvest.
”I’ll probably kill it.”
This one I understand. Most people who haven’t grown anything before have a story about a houseplant they killed, a basil plant from the grocery store that died in two days, or a garden attempt that went nowhere. That history makes it hard to invest in something new.
Here’s the honest breakdown: the most common microgreens failure modes are over-watering (leading to mold), under-watering (leading to wilted plants), and too little light (leading to leggy, weak growth). All three are visible within the first few days, and two of them are fixable mid-grow. Over-watering is easy to identify because white or gray mold appears on the surface of the medium; you can scrape it and continue, or start over with a new tray. Under-watering is immediately obvious from limp seedlings, and a single good misting usually revives them within hours.
Radish, the variety I recommend for first-time growers, has a germination rate above 90% under normal conditions and a high tolerance for temperature variation. You would have to actively try to fail it.
What Microgreens Actually Are
Before getting into specifics: microgreens are not sprouts. This distinction matters both for food safety and for understanding what you’re growing.
Sprouts are seeds germinated entirely in water, eaten root-to-tip. They grow in 3-5 days and never touch a growing medium. Microgreens grow in a thin layer of soil or coco coir, develop their first true root structure, and are harvested just above the medium at the cotyledon stage: that’s the first set of leaves the plant produces after germination, before the first “true” leaves of the mature plant appear.
The cotyledon stage is when seed-stored energy is at peak concentration in the plant tissue. It’s a brief, dense period of nutrient availability before the plant starts producing its own food through photosynthesis at scale. That’s the nutritional case for eating microgreens; it’s also why the flavor is often more intense than the mature plant. Radish microgreens taste sharply of radish. Sunflower microgreens taste nutty and slightly sweet in a way that sunflower seeds don’t quite capture.
Most edible plants can be grown as microgreens, but varieties with fast germination and short cycle times are easiest to start with.
The Three Best Varieties to Start With
Radish
Radish is the single best first microgreen. It germinates in 24-36 hours under almost any conditions, produces a thick, sturdy stem, and is ready to harvest in 5-7 days. The seeds are large enough to sow by hand without difficulty, and they don’t clump. Flavor is mild to sharp depending on variety: “daikon” radish is milder, “rambo” (purple-stemmed) is sharper. Failure rate for beginners: very low.
Pea Shoots
Pea shoots take slightly longer (10-14 days to full harvest size), but they produce one of the most satisfying yields of any microgreen. The seeds are large, easy to handle, and easy to sow evenly. Growth is visible and fast; you can watch pea shoots gain an inch a day during peak growth. They have a mild, sweet flavor that works in almost any application. One note: pea seeds need to be soaked for 4-8 hours before sowing to speed germination. That’s the only prep step that differentiates them.
Sunflower
Sunflower microgreens are arguably the most satisfying to eat: thick, crunchy stems with a nutty flavor. The seeds are large, the growth is dramatic, and the final product looks impressive. The one catch: sunflower seeds have a hull that tends to stick to the cotyledons as they open. This is cosmetic, but beginners sometimes worry about it. The fix is to sow seeds densely and keep them covered and weighted down during germination; the pressure helps the hulls separate as the seedlings push up. A well-grown sunflower tray at 10-12 days is one of the most satisfying first harvests you’ll have.
What You Actually Need to Get Started
Here’s the minimal gear list with realistic costs:
| Item | What to Get | Cost |
|---|---|---|
| Growing tray | 10x20 inch nursery flat (solid bottom + holes optional) | $1-3 |
| Growing medium | Coco coir brick (rehydrates to fill 3-4 trays) or basic potting mix | $3-5 |
| Seeds | Radish (start here), pea, or sunflower | $2-4 per packet |
| Light source | South-facing window OR basic LED grow light | $0-30 |
| Water source | Spray bottle or watering can with gentle head | $3-8 |
| Dome / cover | Humidity dome, second tray turned upside down, or cardboard | $0-3 |
Realistic first tray cost: $10-15. If you have a spray bottle and a south-facing window, you can start for under $10.
You do not need: special microgreens soil mixes (regular potting mix works fine), grow mats (optional upgrade), heating mats (useful for winter but not required), pH meters (relevant at scale, not for a first tray), or nutrients (there are enough nutrients in seeds and most potting mediums for the 7-14 day cycle).
The step-by-step growing guide goes deeper on each component, including when upgrades actually pay off.
Your First Tray: A 10-Day Preview
This is roughly what the experience looks like growing radish:
Day 1: Fill your tray with about an inch of coco coir or potting mix. Wet it until it’s evenly moist, not dripping, not dry. Scatter radish seeds densely across the surface (roughly 1.5-2 oz of seeds per 10x20 tray). Mist the seeds, cover with your dome or a second tray, and put it somewhere dark and warm (65-75°F ideal).
Day 2: Lift the cover and check. You should already see white root tips emerging from the seeds. This is normal and fast. Radish doesn’t waste time. Re-cover and leave it.
Day 3: Stubby yellow-white sprouts are visible, pushing up. The seeds are germinating en masse. Keep them covered. The darkness and pressure of the cover are what drive the initial stem extension upward.
Day 4: Remove the cover. The sprouts should be 1-2 inches tall, pale yellow or greenish, reaching upward. Move them to your light source. Start watering at the base of the tray: bottom watering (setting the tray in a shallow dish of water for a few minutes) is cleaner than top-watering once growth is established.
Day 5-6: The cotyledons open. This is the moment the tray transforms from pale sprouts into vivid green microgreens. The color change happens fast, within 12-24 hours of light exposure, as chlorophyll accumulates and the plants turn deep green. The flavor intensifies as the plants green up.
Day 7: Your first tray is ready to harvest. Grab clean scissors or a sharp knife. Cut across the tray at about half an inch above the medium surface, taking the whole canopy in sweeping cuts. Rinse the cut greens, dry them, and store in a bag or container in the fridge.
What you have: approximately 150-200 grams of fresh radish microgreens, ready to eat. One tray costs you $3-5 in materials and about 20 minutes of total hands-on time spread across a week.
Days 8-10 (pea shoots timeline): If you’re growing pea shoots alongside your radish tray, this is when they hit their most photogenic stage: dense, curling tendrils with wide leaves, growing visibly taller each day. Harvest pea shoots when they reach 4-6 inches, ideally just as the tendrils start to curl. The flavor is sweetest at this stage.
One thing to know: microgreens don’t regrow after cutting. The cotyledon stage is a one-time event. Once you’ve harvested, the tray is done. This is why most growers start a new tray every few days rather than one per week; you’re creating a rolling harvest so there’s always something ready.
What to Do with Your Harvest
Eat them
The best use of your first harvest. Microgreens are most commonly used as a finishing green: scattered over eggs, added to sandwiches, mixed into salads, stirred into soups at the last moment. They don’t hold up to heat the way mature greens do, so use them raw or added at the very end of cooking.
Radish microgreens are particularly good on avocado toast, in grain bowls, and on fish tacos. Pea shoots work beautifully in Asian-inspired stir-fries added off-heat, or tossed with sesame dressing as a standalone salad. Sunflower microgreens are good enough to eat straight off the tray.
Share them
If you grow a full 10x20 tray, you will likely have more than you can eat in a week. Microgreens make genuinely good gifts; pack them in a small container, add a card with what they are and how to store them. Most people have never had truly fresh microgreens and are surprised by the flavor.
Sell them
This is further down the road, but it’s a real possibility. Microgreens are sold at farmers’ markets for $3-6 per 2-oz clamshell. A single 10x20 tray produces roughly 5-8 clamshells of sellable product. Restaurants pay $10-20 per pound for consistent supply. Once you understand the growing variables and can produce reliably, the economics of a small microgreens operation are surprisingly clear. The small space growing resources cover the path from home growing to a marketable operation.
The Natural Progression
One tray teaches you germination and watering. A rack of four trays teaches you rotation, variety management, and consistency. Ten trays in a spare room teaches you about temperature control, airflow, and production planning.
The progression isn’t required; many people grow one tray at a time indefinitely and are completely satisfied with that. But if you find yourself wanting more, the path is linear and each step makes the next one obvious.
Most people who grow their first successful tray grow a second one within a week. That’s how it works. The feedback is immediate: you grew food, you ate it, it was better than the stuff from the store, and you already know what you’d do differently next time. That’s a complete loop, and it’s a rare thing to have on your first attempt at anything.
Once you’ve grown three trays successfully, you understand the variables well enough to grow any variety. At that point, the step-by-step growing guide will help you move into longer-cycle varieties and higher-output multi-tray setups. And when you’re ready to move beyond microgreens entirely, the beginner hydroponic systems guide will feel familiar; the concepts you learned growing microgreens translate directly.
Start with one tray of radish seeds. Everything else follows from that.
[ FAQ ]
How much space do I need to grow microgreens?
Very little. A standard 10x20-inch nursery tray fits on a windowsill, a kitchen counter, or a shelf. You need enough horizontal space for the tray and a light source above it. That's it. Many people start with a single tray on a kitchen counter next to a south-facing window.
Are microgreens the same as sprouts?
No, and the distinction matters for food safety. Sprouts are germinated seeds grown in water; you eat the seed, root, and shoot together. Microgreens grow in a medium (soil or coco coir), are harvested above the root, and are significantly lower risk for foodborne illness. They also taste more like the mature plant: radish microgreens taste like radishes, not like raw seeds.
How long do microgreens last after harvest?
Harvested microgreens last 5-10 days in the refrigerator in an airtight container or bag. Harvest with clean scissors, let them dry completely before storing (wet greens rot faster), and don't wash until you're ready to eat. For maximum shelf life, cut just before you need them; a tray on your counter is essentially a living refrigerator.
Can I grow microgreens without a grow light?
Yes, if you have strong natural light. A south-facing window in summer may be enough for low-light varieties like pea shoots and radish. The problem is consistency: window light varies by season, time of day, and weather. Microgreens grown in low light get leggy (tall, weak stems chasing the light) and produce less. A basic LED grow light ($15-30) eliminates this variable entirely and is worth it if you plan to grow more than one tray.
How do microgreens compare to vegetables in nutrition?
Research from the USDA and the University of Maryland has found microgreens contain 4-40 times the nutrient concentration of their mature counterparts by weight, depending on the variety. Red cabbage microgreens, for example, were found to have 40 times more vitamin E than mature red cabbage. This is because the seed stores nutrients for germination; at the cotyledon stage, those nutrients are densely packed in a small amount of plant mass.
Related Articles
How to Grow Microgreens Step by Step (Seed to Harvest)
Grow microgreens from seed to harvest in 7–14 days with a $10 tray. Covers blackout period, bottom watering, light setup, and harvest timing by variety.